

How To Get Ipod Classic Out Of Disk Mode
macOS Monterey was released a few days ago. Merely as with most new releases of macOS, also for macOS Monterey, Apple tree decided to remove official support for some of the older Mac hardware. In general anything older than a 2015 model is no longer supported. This doesn't necessarily mean that those Mac models cannot handle the new performance system, in most cases it would run information technology simply fine. Luckily, if y'all desire to, at that place are always ways to get around these restrictions. In this article, I volition describe step by pace how to install macOS Monterey on officially unsupported models by using OpenCore Legacy Patcher.
YouTube Video
If y'all are interested, I also created a YouTube video from this blogpost. If y'all prefer archetype text, you can just follow the rest of this article:
Introduction
In an earlier post, I described how to install the predecessor of Monterey, Big Sur, on unsupported models. I used MicroPatcher for that article and mentioned BigMac there every bit well. For this article, I volition go for a unlike method and I will use OpenCore Legacy Patcher to get around the hardware checks.
In contrast to MicroPatcher, this method uses an unmodified macOS installer. Instead, it tricks the installer in thinking it is running on a newer, supported, model.
Supported models
Y'all tin find a comprehensive list of models on which OpenCore is supported over hither: https://dortania.github.io/OpenCore-Legacy-Patcher/MODELS.html
The minimum Os version installed needs to exist 10.9 (Mavericks)
For hardware without Metallic support, using a patch, the following should work:
- MacBook5,ane (Late 2008) and later on
- MacBookAir2,ane (Late 2018) and later
- MacBookPro4,1 (Early 2008) and subsequently
- Macmini3,1 (Early on 2009) and after
- iMac8,1 (Early on 2008) and subsequently
- MacPro3,1 (Early on 2008) and later
With Metal support, everything newer than the following is fine:
- MacBook8,i (Mid-2015) and after
- MacbookAir6,1 (Mid-2012) and later
- MacBookPro9,one (Mid-2012) and later
- Macmini6,one (Belatedly 2012) and after
- iMac13,1 (Late 2012) and later
- MacPro4,1 (Early 2009) and later (with Metal GPU)
Overview of the procedure
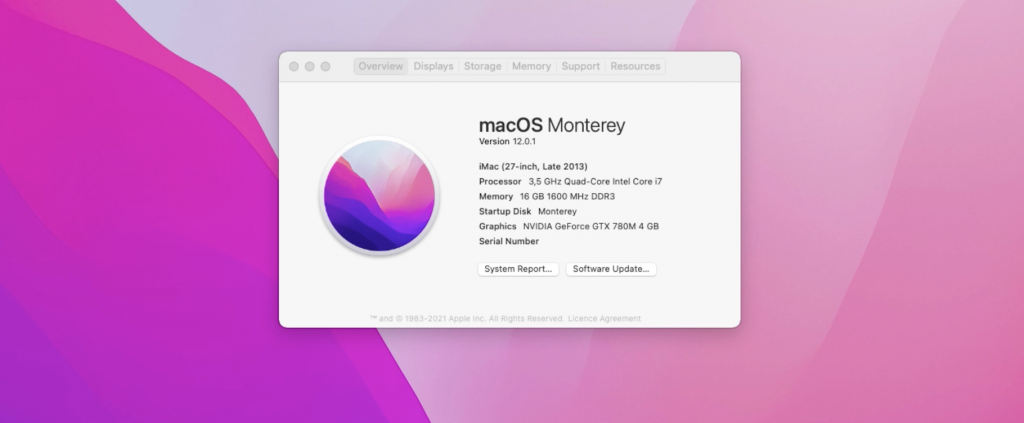
For the article, I will be using a Belatedly 2013 iMac with model identifier iMac14,two. My model has the highest specced CPU: an i7 4771, a 256GB SSD, 16GB RAM and the NVIDIA GeForce GTX 780M with 4 GB. This is interesting as support for NVIDIA GPUs has been mainly removed in Monterey. It was running macOS Catalina equally a starting bespeak, which is the last officially supported release on this model.
The steps we need to go through are the post-obit. These need to be executed on the device where you would like to install Monterey.
- Download the Install macOS Monterey app without using the App Store
- Create a bootable USB drive for macOS Monterey
- Build and install OpenCore on the USB drive
- Kicking from the USB drive and install macOS Monterey
- Install OpenCore on the SSD/hard drive
- Optionally install patches (mainly for not-Metal or non-supported GPUs like my NVIDIA card)
Step 1) Download the Install macOS Monterey app without using the App Store
The first step in this whole procedure, is to get our easily on the installer. As the device which we want to become Monterey on is officially non supported, the installer for Monterey will non exist shown in the App Store on this device. So we need to notice another way to become our hands on InstallAssistant.pkg for Monterey.
Mr. Macintosh keeps a list with versions and links to directly download the InstallAssistant.pkg file. You can find this here: https://mrmacintosh.com/macos-12-monterey-full-installer-database-download-directly-from-apple tree/:
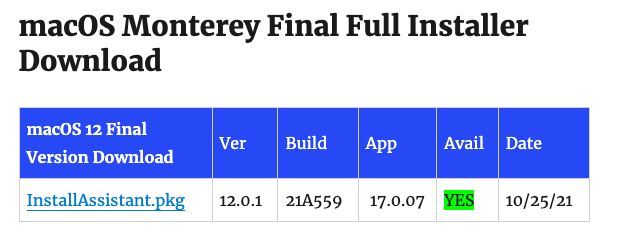
At the time of writing, the latest and release version was 12.0.1 (build 21A559) and I used the following link to download the bundle from Apple: https://swcdn.apple.com/content/downloads/39/lx/002-23774-A_KNETE2LDIN/4ll6ahj3st7jhqfzzjt1bjp1nhwl4p4zx7/InstallAssistant.pkg
Once you lot have downloaded the .pkg, you can double-click on it and run through the dialogs to install "Install macOS Monterey" to your Applications folder:
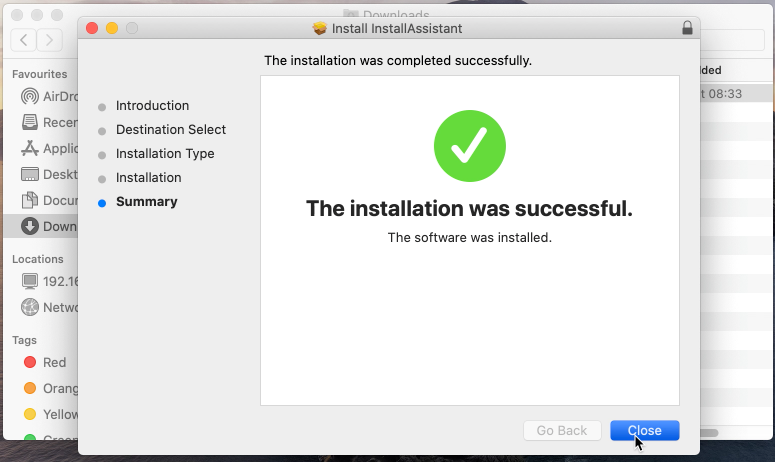
In example you would meet issues due to whatsoever hardware checks (I did non experience any on my iMac), y'all can besides manually extract the .app from the .pkg and move the .app to your Applications folder. Yous can use the following command in final for that.
jensd@jensds-iMac ~ % cd Downloads jensd@jensds-iMac Downloads % pkgutil --expand-full InstallAssistant.pkg monterey/ jensd@jensds-iMac Downloads % mv monterey/Payload/Applications/Install\ macOS\ Monterey.app /Applications/
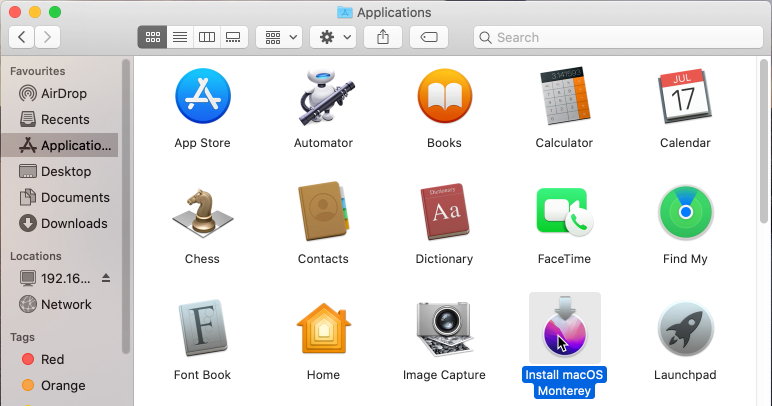
If this went well, you should at present have the Install macOS Monterey awarding in your Applications folder. This is what we demand for the adjacent step:
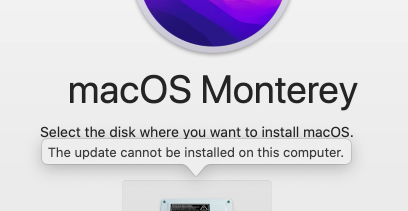
Running this just like on an unsupported model, like mine, won't work as you will get a "The update cannot be installed on this estimator" during the installation:
Pace ii) Create a bootable USB drive for macOS Monterey
Now that we have the installer downloaded and ready, we will employ it in this step to create a bootable Monterey installation USB.
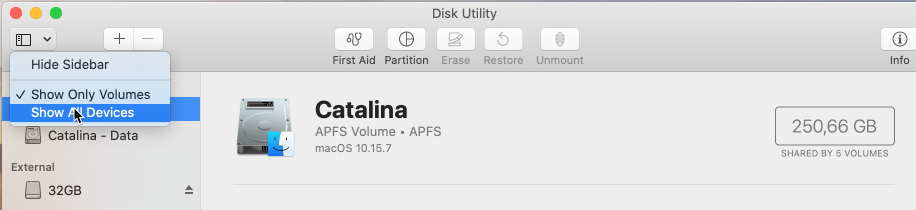
First nosotros need to set the USB drive to make sure we tin kick from it and patch information technology with OpenCore in the next steps. To do then, insert the USB bulldoze and open Deejay Utility. In Disk Utility, click to show All devices:
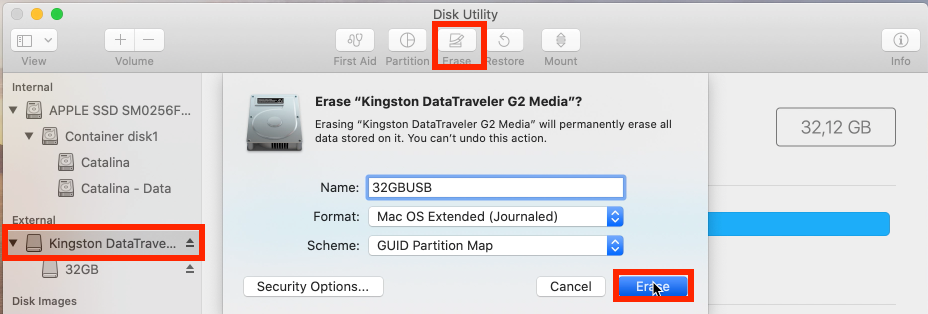
And then, in the left column, select your USB drive and click Erase on the tiptop menu. Now give the drive a name, I chose 32GBUSB, select Mac Bone Extended (Journaled) and GUID Partition Map equally scheme and click Erase:
When this is done, we tin use the installer to fix the USB and become files on it. Open a terminal window and execute the following control:
jensd@jensds-iMac ~ % sudo /Applications/Install\ macOS\ Monterey.app/Contents/Resources/createinstallmedia --volume /Volumes/32GBUSB Password: Ready to offset. To continue nosotros need to erase the book at /Volumes/32GBUSB. If you wish to go on blazon (Y) then press return: y Erasing disk: 0%... 10%... 20%... 30%... 100% Making disk bootable... Copying to deejay: 0%... 10%... xx%... 30%... 40%... 50%... 60%... 70%... 80%... 90%... 100% Install media now bachelor at "/Volumes/Install macOS Monterey"
This can take some time, depending on the speed of your USB drive. In example you chosen your drive different when erasing it within Disk Utility, you volition demand to adapt this in the control here.
At this bespeak, we accept a standard bootable USB bulldoze for installing Monterey. This one could be really be used now to install Monterey on supported hardware.
Footstep three) Build and install OpenCore on the USB drive
From hither we start with the steps that are needed to overcome the fact that our hardware is no longer officially supported. Nosotros will apply OpenCore Legacy Patcher for that.
OpenCore is a bootloader that is often used for Hacintosh builds but it runs on real Apple hardware but fine as well. OpenCore patches or changes some information in memory, making the software think it is running on newer hardware and by this bypasses any restriction.
To kickoff with this, nosotros first need to download the latest version, which tin exist found here: https://github.com/dortania/Opencore-Legacy-Patcher/releases
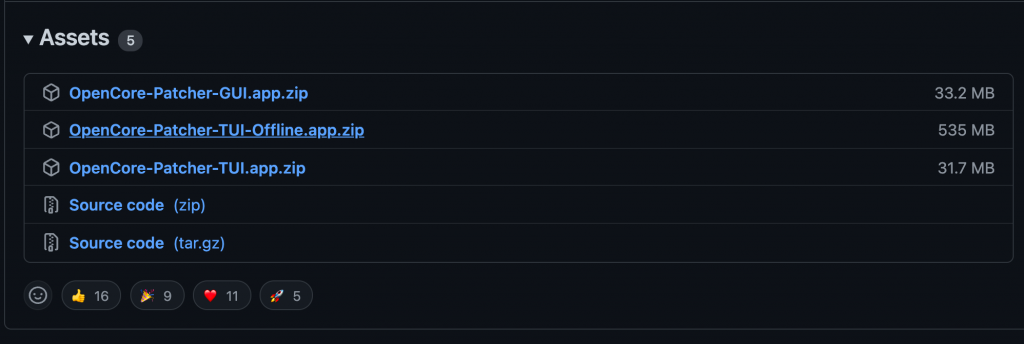
Every bit you tin can see, there is a graphical version (OpenCore-Patcher-GUI.app.zip), an offline text-based version (OpenCore-Patcher-TUI-Offline.app.zip) and a text version (OpenCore-Patcher-TUI-Offline.goose egg). That last i, the regular text version, will exercise just fine.
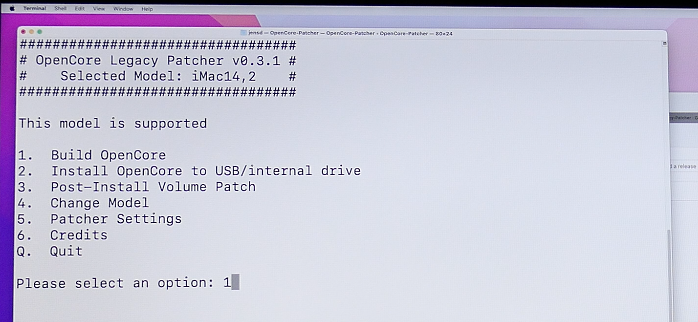
After downloading OpenCore-Patcher-TUI.app.zip, extract it by clicking on it in Finder and open the awarding. You should come across a terminal window now with several options:
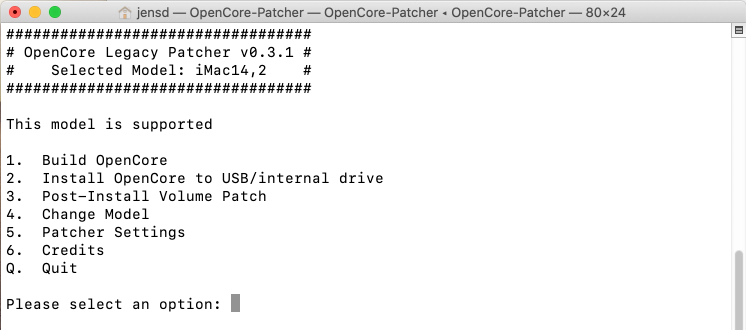
We demand to starting time with choice 1) Build OpenCore:
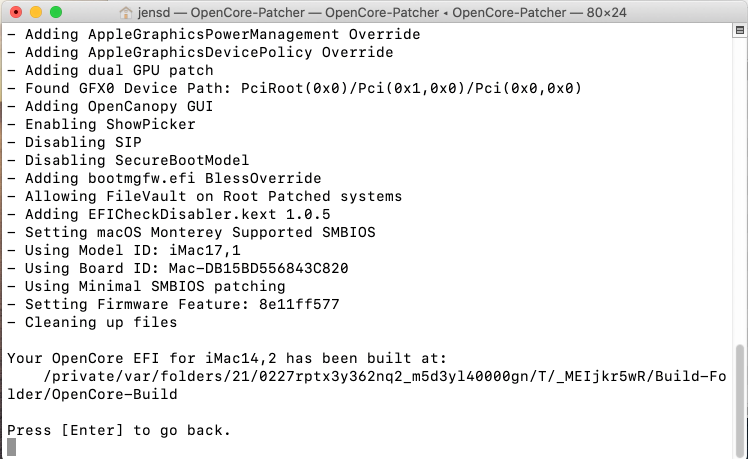
This shouldn't take very long. Every bit you can run across in the output, this has built OpenCore specifically for the Mac model which we are working on (iMac14,2 in my case).
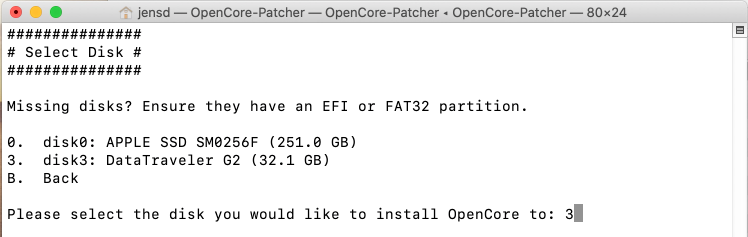
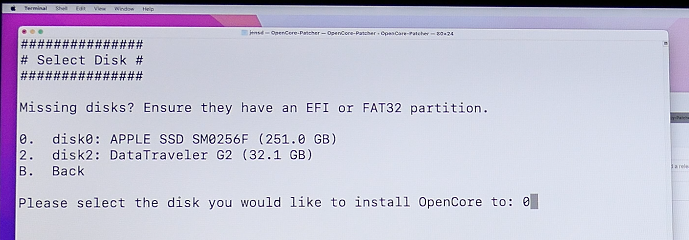
Printing Enter to get back to the chief menu and at present cull option ii) Install OpenCore. Later on entering this option, select your USB drive from the list (disk3 in my case):
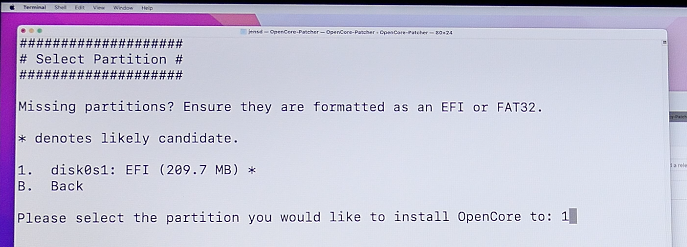
In the side by side screen, select the only EFI division which exists on that drive:
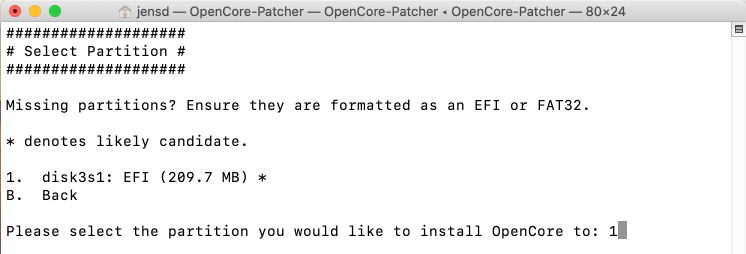
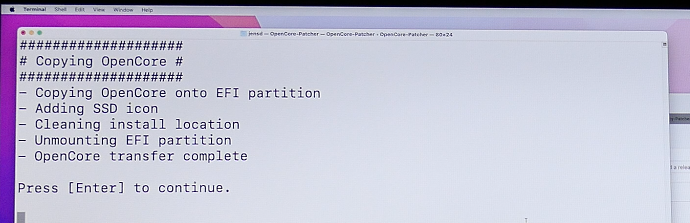
This will install the OpenCore bootloader to the EFI partition on the USB drive. In a later phase, we will echo this process simply for the internal drive in our Mac.
Step four) Boot from the USB bulldoze and install macOS Monterey
Boot OpenCore and launch the installation
The USB drive is fully prepared in the previous three steps. Now it is time to kick the Mac from the USB bulldoze in guild to install Monterey. To practise so, reboot your Mac and hold down the Option key during kicking time.
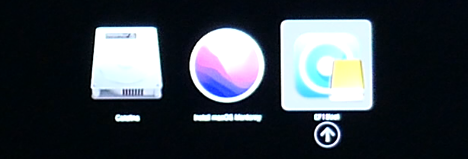
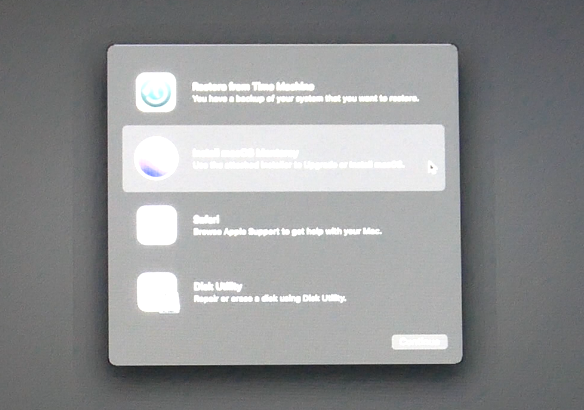
Property down the Option key brings up the bootloader. In there, you should run into the currently installed system (named Catalina in my case), an entry to install Monterey and an EFI boot entry with the OpenCore logo. The final two are on our USB bulldoze.
From here, the standard bootloader, we tin't kickoff the installation as we demand to do this from OpenCore to hide the real organisation identifier. Instead, select the EFI boot entry using the pointer keys and printing enter:
This brings you in OpenCore, which looks very similar to the standard bootloader. THe only departure is the text at the right bottom corner. From here yous can at present choose the "Install macOS Monterey" option:

This will launch the installer from the USB drive, which can take some fourth dimension. In one case you arrived in the installer, you should see something like this:
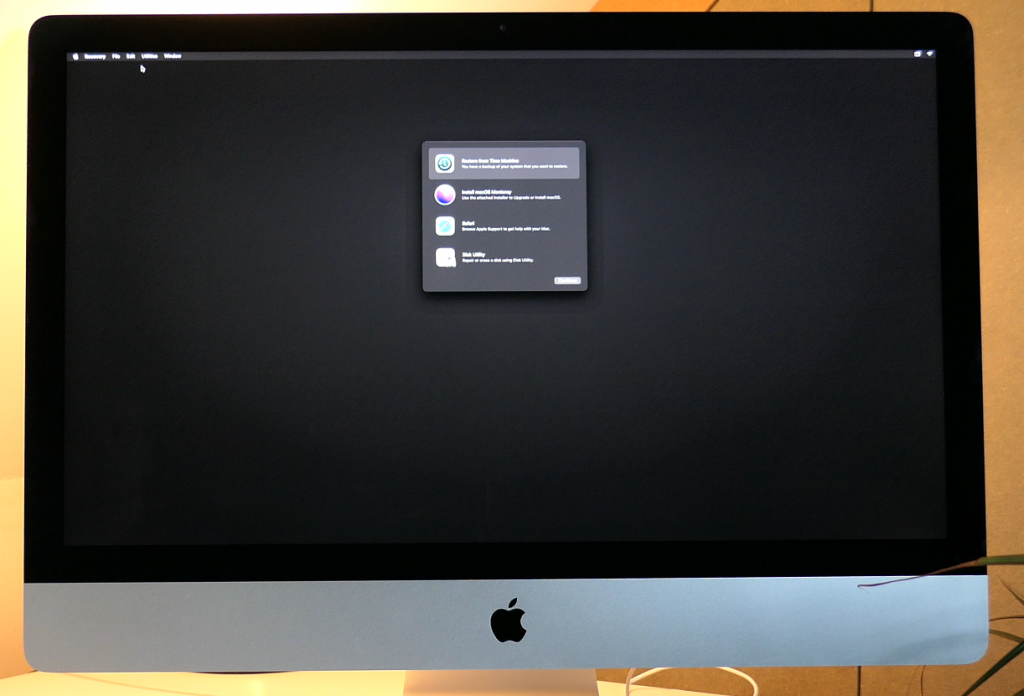
Set up your internal SSD/Hard disk for the installation
At this point nosotros need to decided where we will install Monterey:
- Fresh install: remove the existing installed organization, and requite the full drive to Monterey
- Dual boot: add together a new Volume and resize the existing ane(s) to go on your current macOS and add Monterey
- Upgrade: upgrade your existing installation
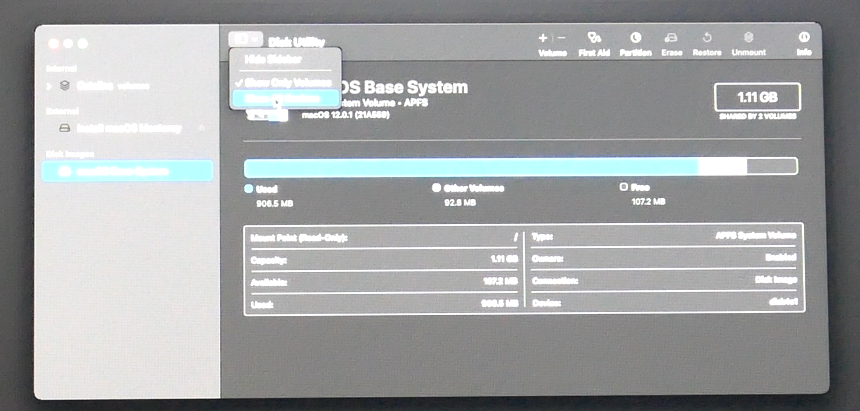
For the first two, we demand to launch Disk Utility first from the card as we need to ready our drive. In Disk Utility, first click on the push button to evidence All devices:
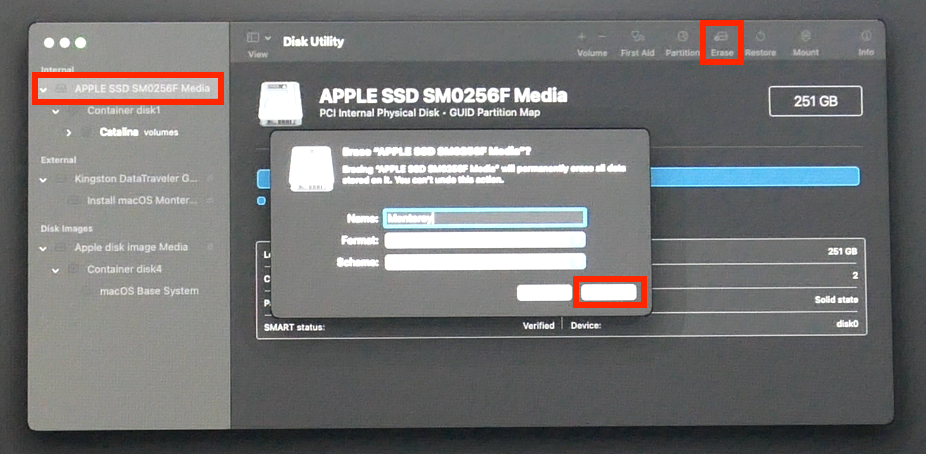
For option 1, to get for a single Bone and do a fresh install of Monterey, click your drive (internal SSD/Hard disk drive) on the left side and click Erase. Give your drive a name (I chose Monterey), choose APFS as Format and GUID as scheme:
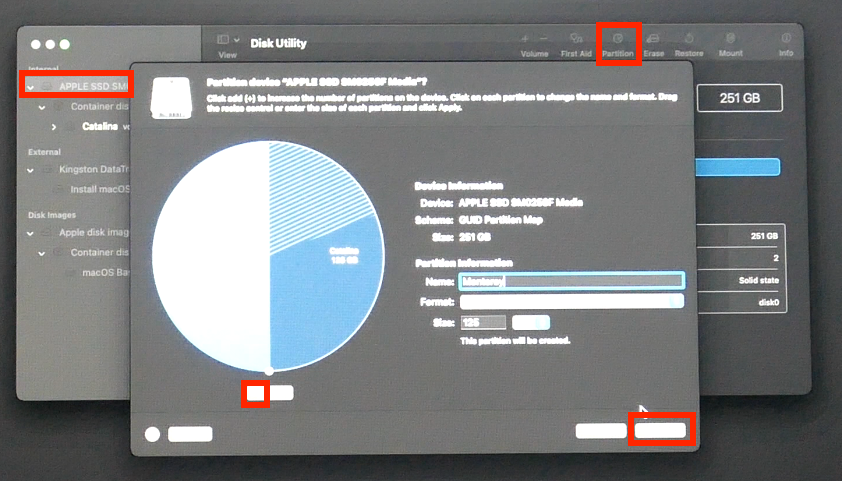
For option ii, to add Monterey together with your current macOS install, click your drive (internal SSD/Hard disk drive) on the left side and click Sectionalization. Click the plus sign here to add together a segmentation and choose to add a partition rather than a volume.
You can change the size on the left side, name the volume (I chose Monterey) and choose APFS as format:
As soon as Disk Utility is ready with the operations on the bulldoze, nosotros are adept to move to the next pace.
Install Monterey
Now that our deejay is prepare, or you decided to upgrade the existing install, you tin outset the installation from the bill of fare:
Click Continue, have the license agreement and select the volume on which yous want to install Monterey. Here y'all need to select:
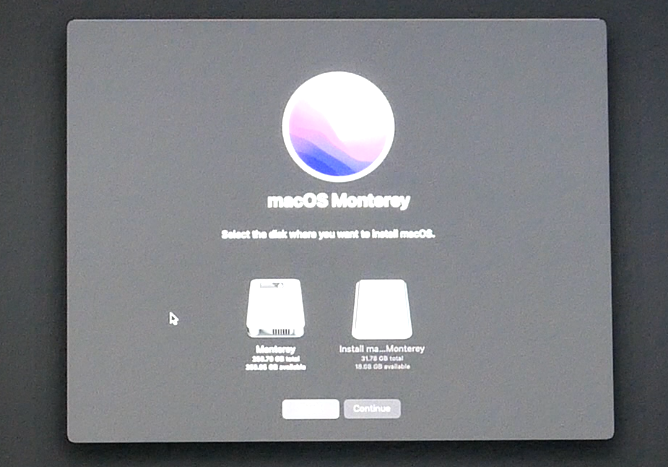
- Fresh install: the only internal volume you lot see here (called Monterey in my example)
- Dual boot: the volume which you added during the segmentation function (called Monterey in my example)
- Upgrade: select the volume which you want to upgrade (chosen Catalina in my case)
From here on, you tin relax and sit dorsum equally the installation can take quite some fourth dimension. If all goes well, y'all should see the following screen afterwards a series of reboots:
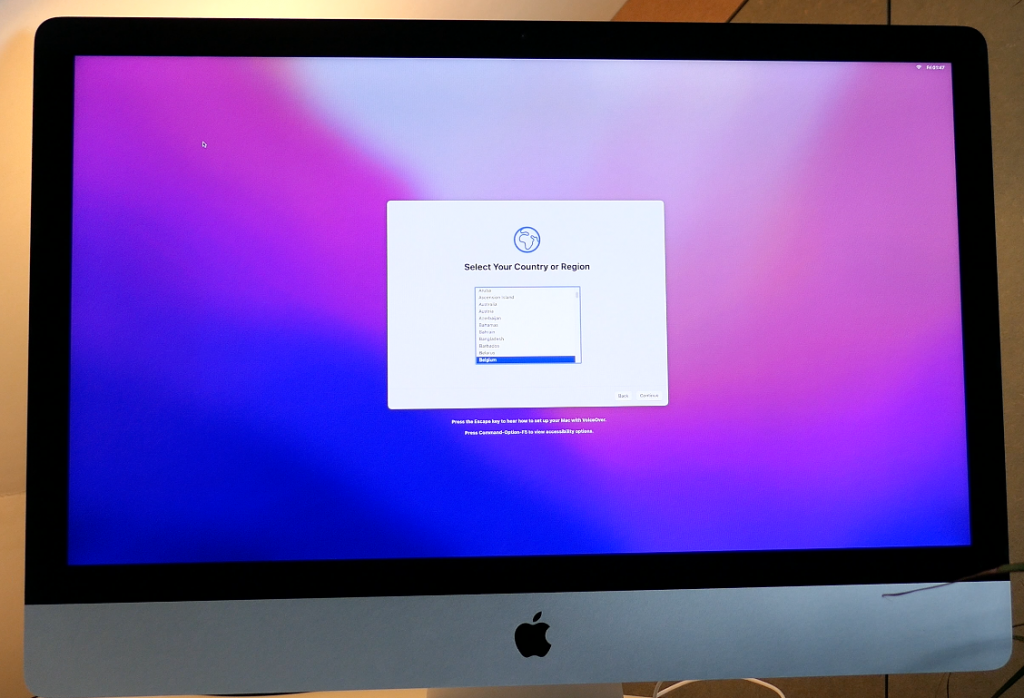
Navigate through the questions, which differ depending on which type of install you decided to go for. Yous tin discover in some cases that everything is pretty slow. This is due to the lack of video card drivers or Metal support. which nosotros volition fix in step vi.
If all goes well, you should end up on the desktop of your newly installed macOS Monterey arrangement:
Step 5) Install OpenCore on the SSD/hard drive
So far we accept successfully installed Monterey on our Mac. But to outset information technology, nosotros notwithstanding demand to kick from the USB drive equally that is where OpenCore is currently installed. In order to fix this, we need to install OpenCore to the internal Hard disk drive/SSD instead.
This goes in the same way as we did in pace 3) for the USB drive. We first demand to download the latest version of the OpenCore Legacy Patcher, which tin still be found here: https://github.com/dortania/Opencore-Legacy-Patcher/releases
Once again, download OpenCore-Patcher-TUI.app.nothing, extract information technology by clicking on it in Finder and open up the application. In the terminal window, we again demand to start with option 1) Build OpenCore:
Once complete, go back to the main bill of fare and now choose option 2) Install OpenCore. Here nosotros now demand to select our internal bulldoze (SSD or HD) instead of the USB drive:
In the adjacent step, select the EFI sectionalization on information technology:
Just as in step 3, this will install the OpenCore bootloader to the EFI partitioning, allowing the official bootloader to kicking from information technology:
At this point it is prophylactic to eject and remove your USB drive. In case you have a fully supported (AMD-based) graphical card, you should be done hither and you tin can do a reboot to test if everything still works.
In some cases it might exist needed to boot property the Option key, then select OpenCore.
Step six) Optionally install patches
If the model of Mac which you are using doesn't have a Metal-supported card or you are having i of the NVIDIA-based models where Apple decided to remove support for, yous need to go through this additional pace.
In this pace, we volition install some patches ion the arrangement that will either add graphics acceleration for non-Metal card or fix the driver problems for others.
Re-launch the downloaded OpenCore legacy patcher, which you lot downloaded in the previous step. At present choose for pick three) Mail service-Install Book Patch:
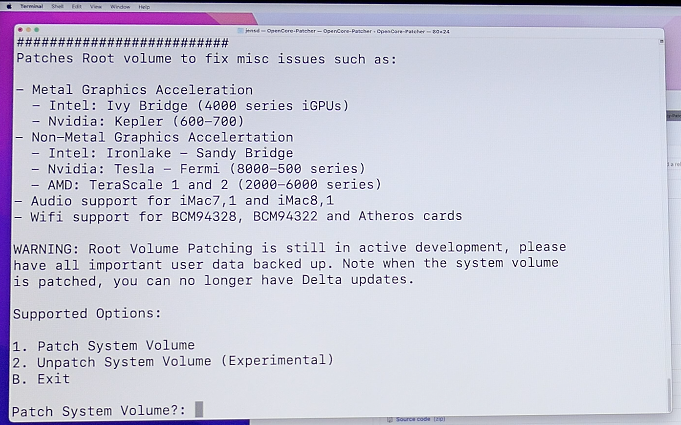
And so select 1) Patch System Volume:

Depending on which patch is needed for your system, a selection will be made and applied later confirmation.
After going through this, perform a reboot and you should exist done. In some cases it might exist needed to boot holding the Option key, then select OpenCore.
Performance
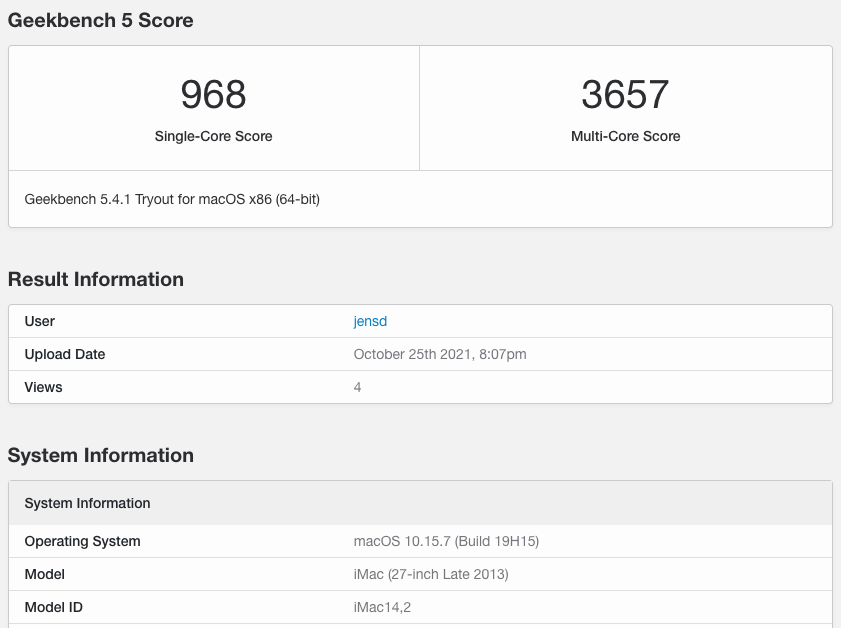
Equally I wanted to check if there would exist any functioning impact after upgrading to Monterey, I did a Geekbench 5 test on my system while information technology was notwithstanding on Catalina:
These were the results for my iMac while being on the last supported OS: Catalina:
And the same exam subsequently upgrading to Monterey:
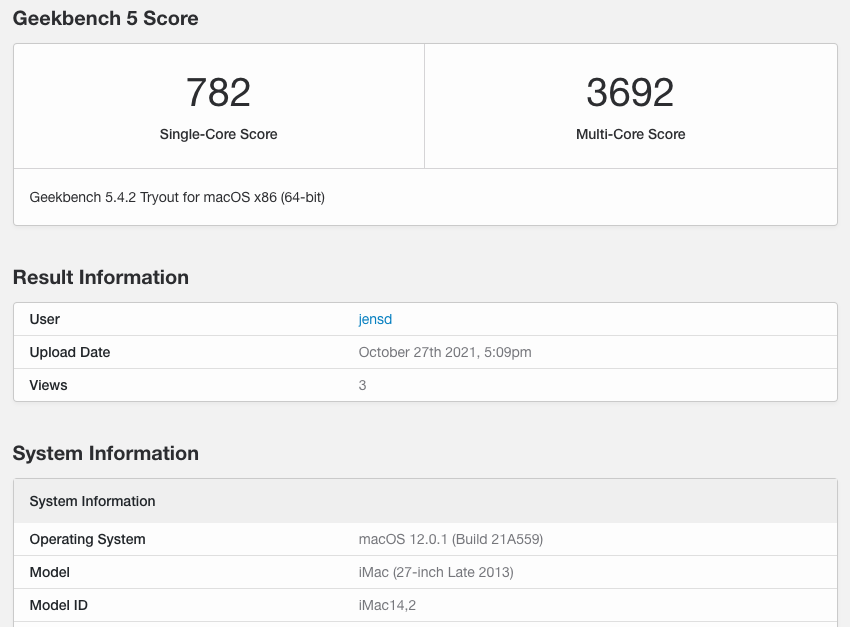
Foreign to run into that the unmarried core score is lower but the important ane, Multi-Core, is slightly higher and so definitely not worse.
In full general the arrangement feels very snappy and I don't really notice whatsoever performance loss in comparing with Catalina.
Hope this mail service will assistance you to extend the life of your beloved Apple Mac :)

Source: https://jensd.be/1589/apple/install-macos-monterey-on-unsupported-models
Posted by: edelenricated.blogspot.com
0 Response to "How To Get Ipod Classic Out Of Disk Mode"
Post a Comment